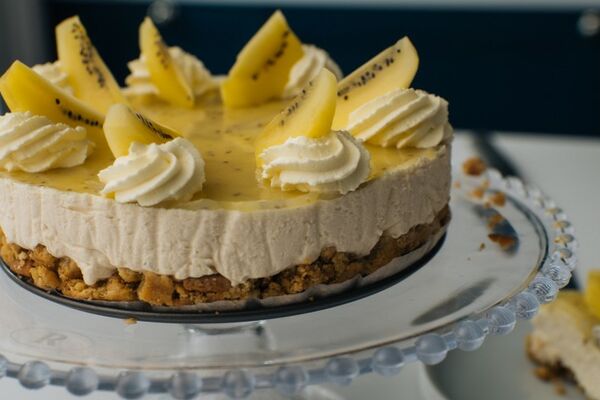
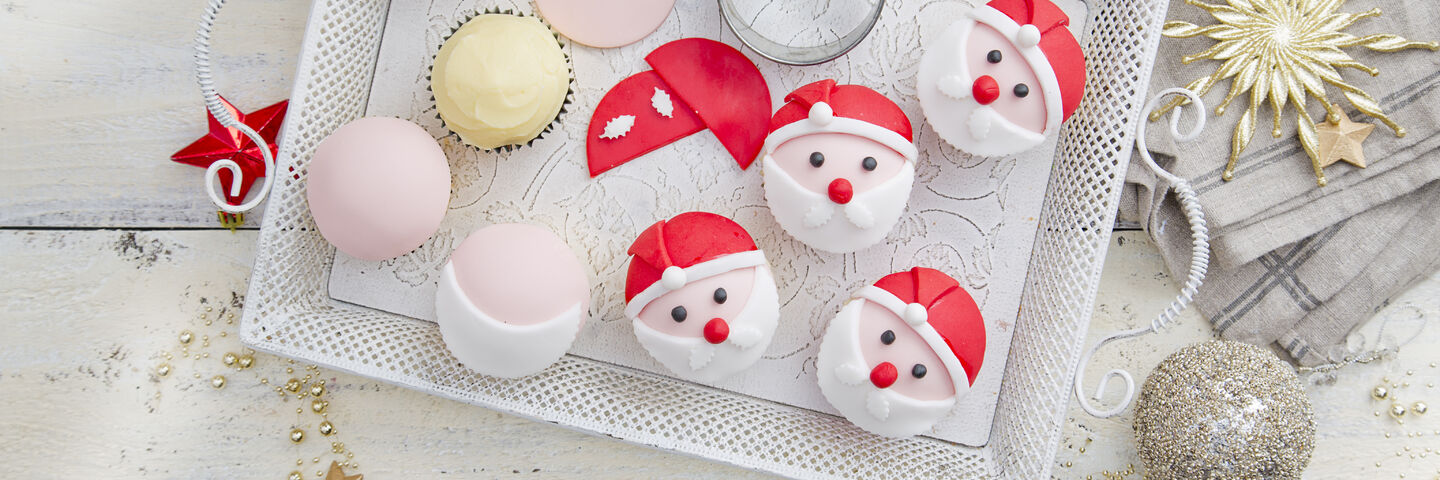
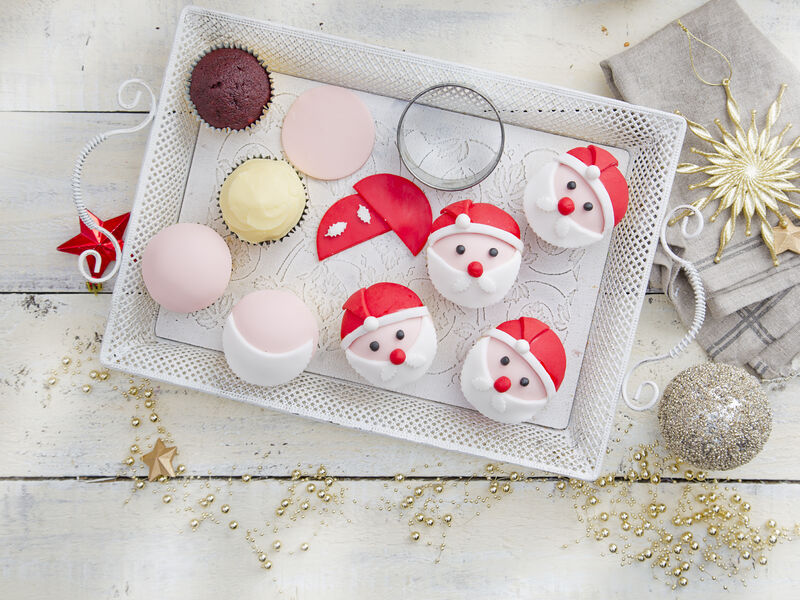
Santa's Red Velvet Cupcakes
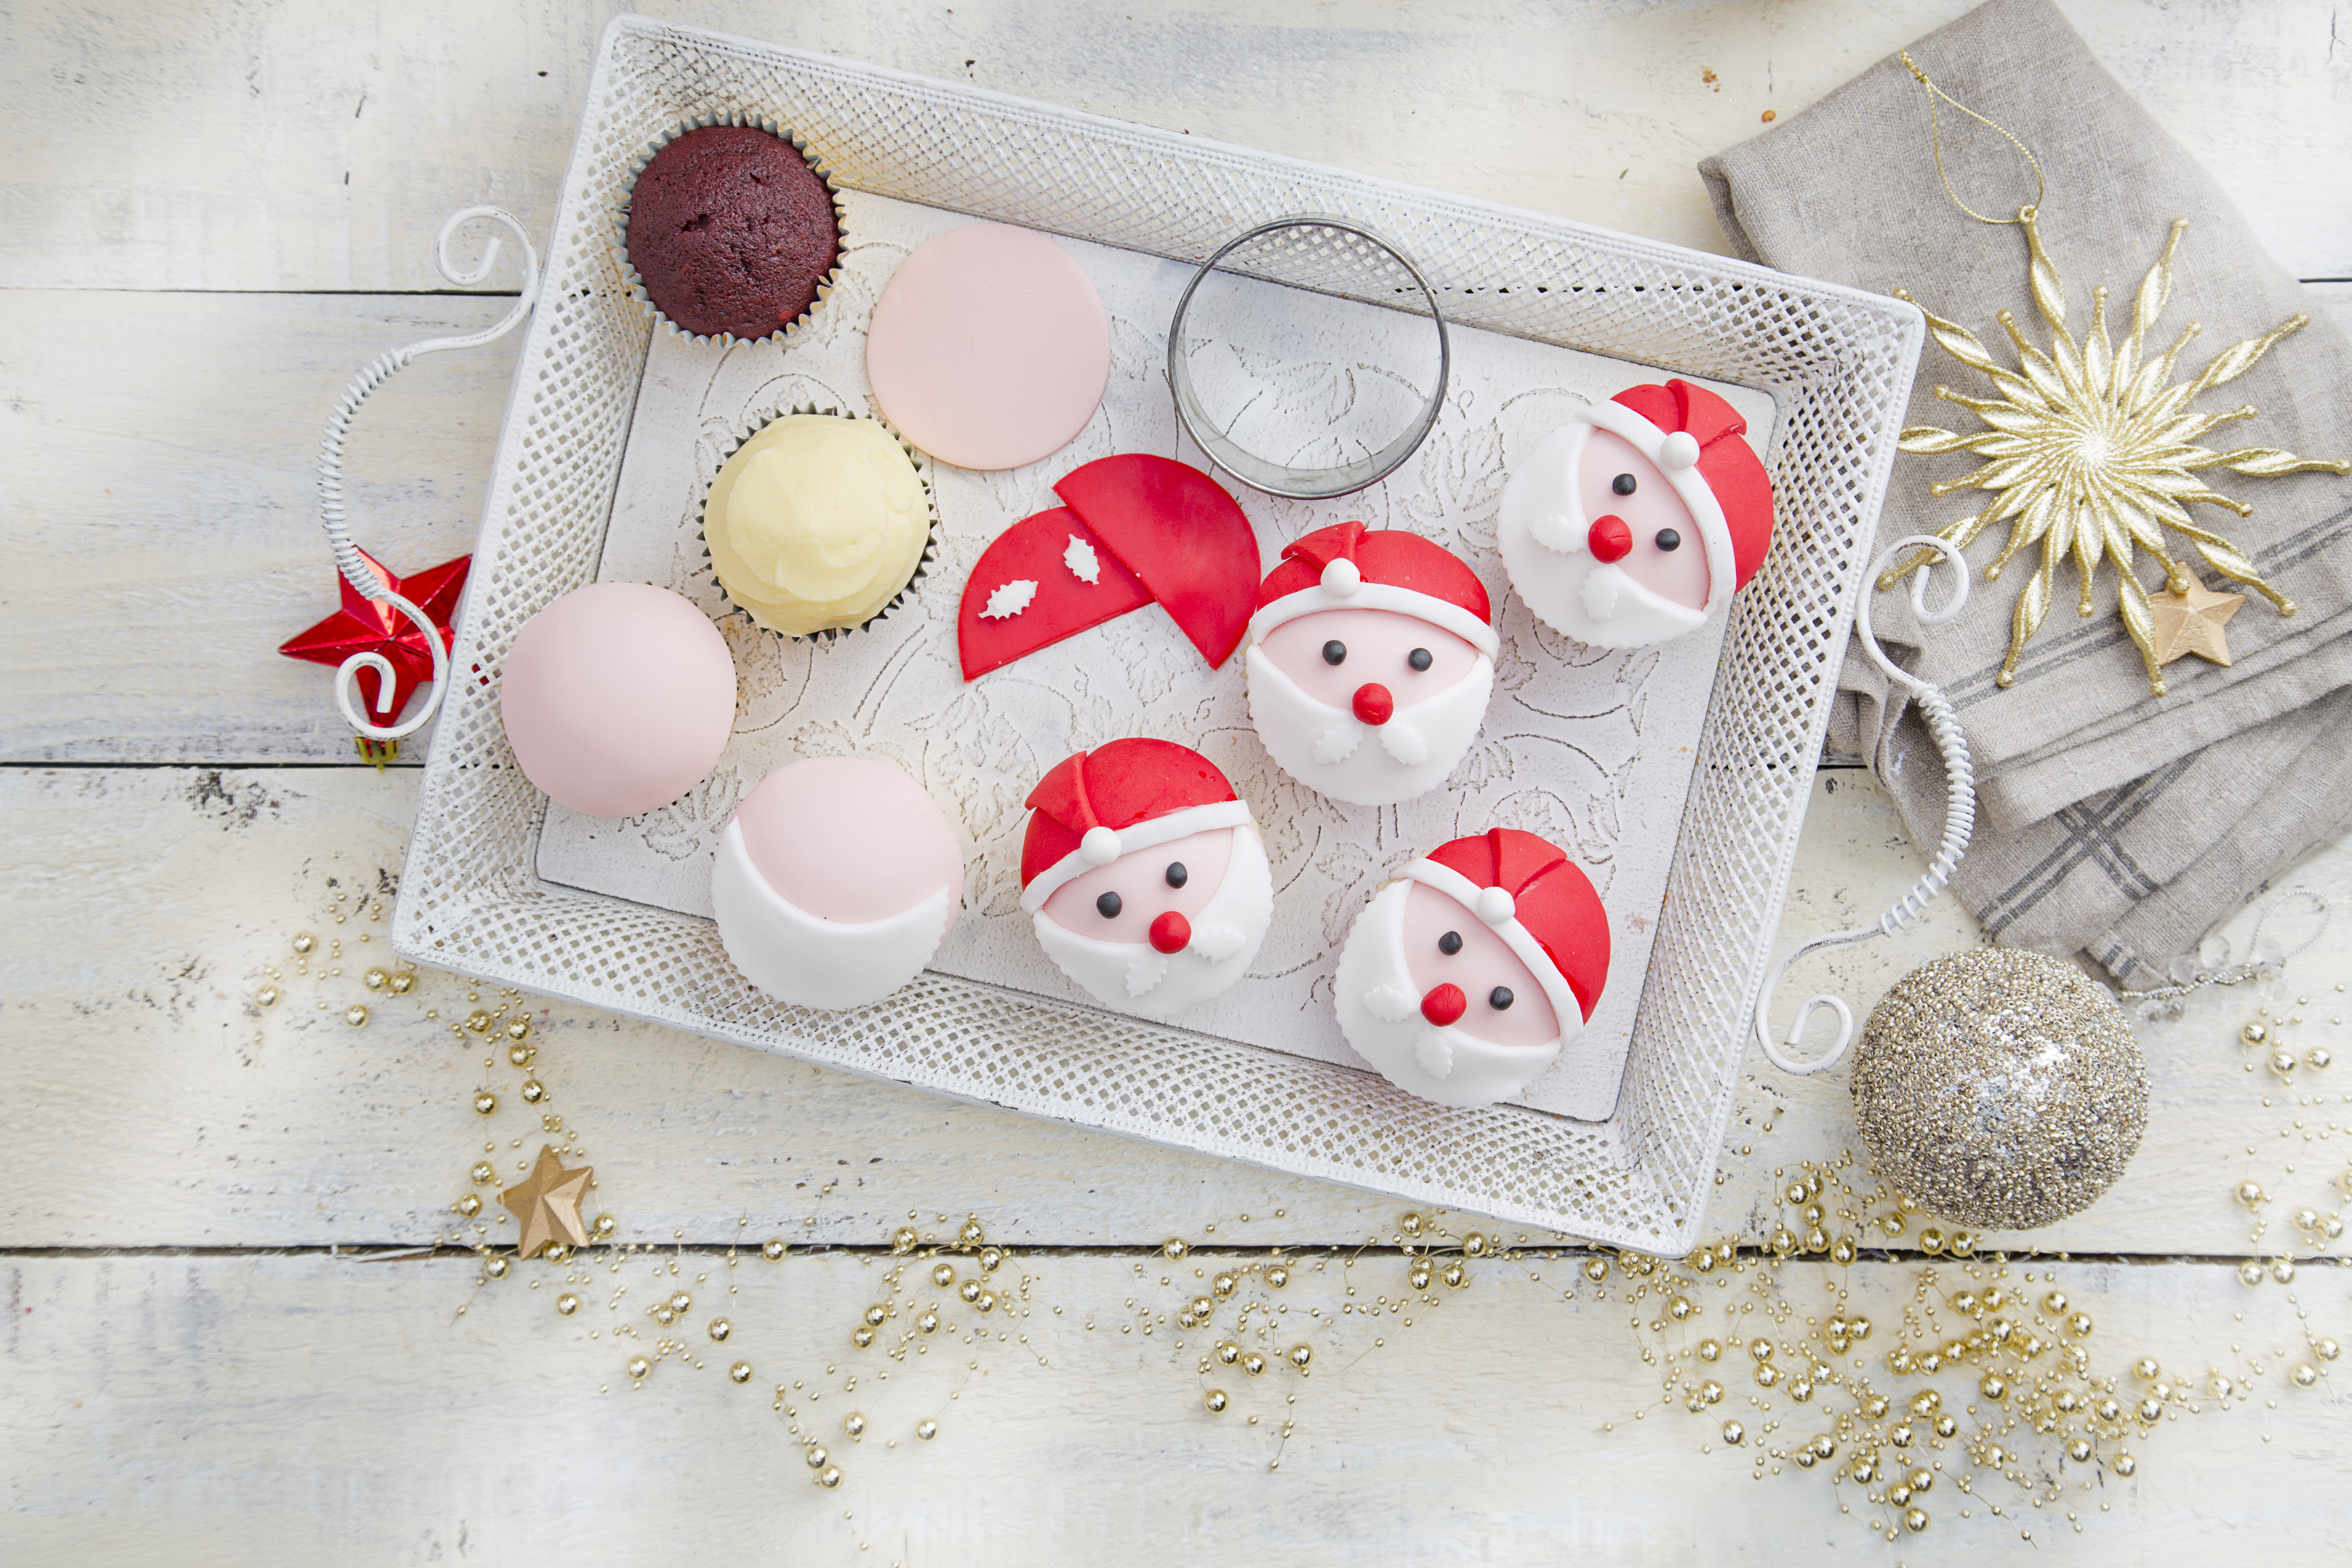
Making and decorating these is a great creative activity to keep kids busy.
6 people
20 minutes
100 minutes
Ingredients
- 0.5 tsp Baking Soda
- 1 knob Black Fondant Icing or black edible pen
- 150 g Caster Sugar
- 2 tbsp Cocoa Powder
- 100 g Cream Cheese
- 1 - Edible Glue
- 1 - Egg
- 1 - Fine Craft Paint Brush
- 12 - Paper Muffin Cases red or silver look best
- 150 g Plain Flour
- 100 g Red Fondant Icing
- 1 tsp Red Food Colouring
- 7 cm Round Fluted Cutter
- 1 pinch Sea Salt
- 1 small Stamper from holly cutter set
- 7.5 cm Straight Sided Cutter
- 125 ml SuperValu Buttermilk
- 1 tbsp SuperValu Cornflour for dusting
- 200 g SuperValu Icing Sugar
- 50 g Unsalted Butter softened
- 1 tsp Vanilla Extract
- 1 tsp Vanilla Extract
- 1.5 tsp White Vinegar
For the Buttercream:
-
175
g
Unsalted Butter
softened
To Decorate:
-
250
g
White Fondant Icing
You Will Need:
-
1
-
Muffin Tin
12-hole
Method
- Preheat the oven to 180°C/gas mark 4. Line a 12-hole muffin tin with paper cases.
- Put the sugar and butter in a large bowl. Beat with an electric mixer for a few minutes, until pale and fluffy, scraping down the sides of the bowl occasionally. Beat in the egg, red food colour and vanilla extract until well blended, then beat in the buttermilk and vinegar. Finally, add the flour, cocoa powder, baking soda and salt and beat on high for a minute or so, until the batter is completely smooth and blended.
- Divide the batter evenly between the muffin cases, filling each one about halfway up. Bake in to oven for 20 minutes.
- Meanwhile, to make the buttercream, beat the butter and cream cheese in a large bowl until smooth and blended. Mix in half of the icing sugar before adding the remaining half and the vanilla extract and beating until smooth and well blended. Cover and refrigerate for at least 1 hour, until firm.
- Once cooked, remove the cupcakes from the oven, transfer to a wire rack and leave to cool. Once cool, spread about 40g of buttercream on each cupcake, smoothing it into a neat dome.
- Finally, for the Santa decoration, knead 150g of the white fondant icing with a knob of the red icing until completely blended to make a pale pink colour. Lightly dust a surface with cornflour and roll the icing out to about 2mm in thickness. Use a 7.5cm round straight-sided cutter to stamp out 12 discs, rerolling the icing as necessary. Put one on top of each cupcake, smoothing it into place.
- Roll the remaining 100g of white fondant icing out to about 2mm in thickness. Using a 7cm round fluted cutter, stamp out 12 discs. Using the straight-sided cutter again, stamp out a piece from the top of each one so as to make them into almost half-moon shapes. Brush the underside of each one with a little edible glue and sit them near an edge of a cupcake, fluted side to the outside, as Santa's beard.
- Reroll the trimmings and cut out 12 strips that are 7cm long and 5mm wide. Again, dab underneath with a little glue and lay the strips from point to point across the top of the beard. This is the hat trim. Next, stamp out 24 holly shapes (without stamping the vein marks in). Again, lightly glue and stick them on Santa's beard as his moustache. Finally, shape 12 small balls as hat baubles with the remaining white fondant. Cover and set aside.
- Roll the red fondant icing as before. Using the straight-sided stamper, stamp out 12 circles. Cut them in half and trim each piece as necessary to fit in the space above Santa's hat trim, gluing to stick. Use a small sharp knife to cut out a small triangular shape to represent the falling peak of Santa's hat. Once you're happy with the shape and how it looks and fits in position, use this one as a template to cut out 11 more. Glue in position with the white baubles at their tips. Shape 12 small balls from the remaining red fondant as Santa's nose and glue in place.
- Finally, shape 24 tiny balls from the black icing and glue in place as Santa's eyes. Alternatively, mark the eyes using a black edible ink pen.
- The cupcakes are ready to serve or store in an airtight container in the fridge for up to two days.
- Tips: Water will work well to stick the fondant pieces on top instead of edible glue. Just be sure to use a minimal amount to avoid it becoming soggy. Keep any fondant icing well wrapped up when it's not in use to help prevent it from drying out.