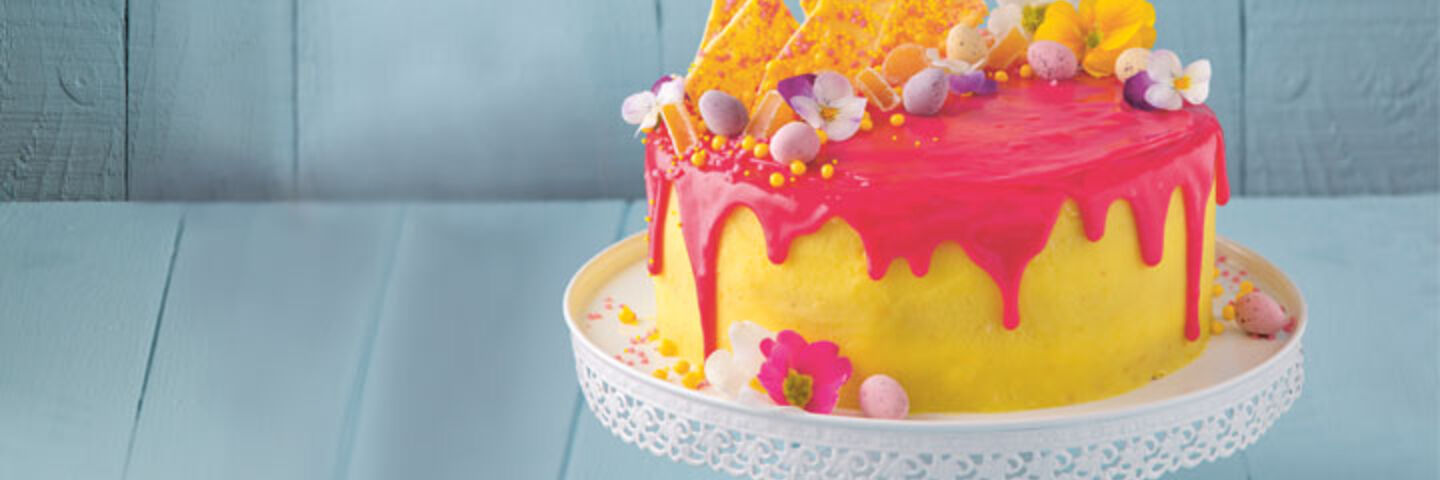
Lemon and Coconut Layer Drip Cake

10 people
40 minutes
40 minutes
Ingredients
- 1 tsp Baking Powder
- 1 tsp Cake Angel’s Tutti Frutti pink granules
- 250 g Caster Sugar
- 150 g Cream Cheese
- 50 g Desiccated Coconut
- 50 ml Double Cream
- 4 large Eggs
- 6 - Fruit Pastilles yellow, halved if liked
- 2 - Lemon
- 200 g Lemon Curd
- 10 - Mini Chocolate Eggs
- 1 - Pink Gel Food Colour
- 250 g Self-Raising Flour
- 0.25 tsp Sugar Craft Canary Yellow String of Pearls
- 500 g SuperValu Icing Sugar sifted
For the Buttercream
-
250
g
Unsalted Butter
softened
For the Cake
-
250
g
Unsalted Butter
softened, plus extra for greasing
For the Chocolate Drip
-
75
g
White Chocolate
chopped
To Decorate
-
1
tsp
Cake Angel’s Tutti Frutti yellow balls
Method
- Preheat the oven to 180°C/gas mark 4.
- Grease 3 x 20cm sandwich tins and line each base with a disc of non-stick baking paper. Set aside on baking sheets.
- Using an electric mixer, beat the butter and sugar together until smooth and fluffy. Add the eggs one at a time with a little flour with each one, mixing until well incorporated each time. Add the rest of the flour with the coconut and baking powder. Finely grate the lemon zest and set it aside for the buttercream. Squeeze the juice into the cake batter and beat until well blended to a dropping consistency.
- Divide the batter evenly between the tins, levelling the tops with the back of a spoon. Bake for 20 to 25 minutes, swapping the tins around halfway through. Once the cakes are cooked through and springy to the touch, remove them from the oven. Leave in the tins for 10 minutes before transferring to a wire rack to cool completely.
- Meanwhile, make the buttercream. Using an electric mixer, beat the butter until smooth. Gradually add the icing sugar and continue to beat until smooth and fluffy. Beat in the cream cheese and reserved lemon zest, then beat in some yellow food colour a little bit at a time to make your preferred tone. Set aside.
- To assemble, use a palette knife to spread 200g of buttercream on top of each cake. Divide the lemon curd evenly between two of the cakes, spreading it level. Stack these two on top of each other on a serving plate or cake stand and top with the remaining cake. Spread the remaining buttercream all around the sides of the cake, ensuring a smooth, even finish. Regularly dip the palette knife in a jug of just-boiled water and wipe it dry with a clean kitchen towel. The warmth of the knife will make it much easier to achieve a really smooth finish. Ensure the top is level and smooth too. Refrigerate for at least 30 minutes, until the buttercream is firm.
- To make the chocolate drip, place the chocolate and cream in a small heatproof bowl. Melt over a pan of simmering water or in 30-second blasts in the microwave, stirring regularly. Once melted and smooth, add enough pink food colour to make your preferred tone. Make sure you use a gel food colour, as water-based ones may cause the chocolate to seize and go grainy.
- Set the mixture aside to cool and thicken slightly, then using a teaspoon, spoon a little at a time all around the top edge of the cake, nudging it gently over the edge to create drips of differing lengths. If too thin, it will run right down the sides and won’t stick. If too thick, it won’t leave the top. Use the remaining mixture to fill in the centre and spread it smoothly with a palette knife.
- Working quickly before the chocolate sets, use the topping ingredients to decorate the cake however you like. Grouping them to one side is very on trend. You could also add some decorations around the base.

